

Connecting your Shopify account will allow your messages, orders, and order information to flow directly into eDesk.
All messages will continue to be delivered to your Shopify account and it will also update when you send messages from eDesk.
In this video, we will walk you through how to connect to eDesk directly from your Shopify App Store, and how you can use eDesk to respond quickly and efficiently to your customer conversations - as known as "tickets" in eDesk.
We will also walk you through all the powerful features and how to use them to elevate your customer support experience!
Before you start
- You’ll need an Admin login to eDesk. If you don’t have an Admin login, you can request one from an Admin user within your business.
- You'll need a Shopify account. To find out how to create one, click here.
01 How do I connect Shopify in eDesk?
- Go to the App Store and click the Shopify tile.

- The App Store page for Shopify provides an Overview of how the channel works with eDesk, and an Installed Channels tab will also be shown if you already have an app for a Shopify store installed. Click Install App to go ahead and install a new Shopify store.

- Now it’s time to authorize eDesk. You can begin the process by entering your Shopify name in the field below.
 To find your Shopify store name, go to your Shopify admin settings. Click on 'Profile' under 'Store details'. Your store name will be displayed there. For more details, check this guide.
- Click Authorize eDesk.
02 Setting up your store
This step will allow you to view your Shopify order information within eDesk.
1. Log into Shopify.2. Take the store name from the URL:
- In the following example, shoestore is the store name
- https://ShoeStore.myshopify.com
4. You will now be directed back to eDesk to connect your Shopify support email to eDesk (email forwarding).

03 Setting up email forwarding
Mail forwarding allows you to receive and send emails from your eDesk account to create a shared, centralized inbox for your customer support team.
This step is very important as it will allow you to view all your customer queries from Shopify within eDesk.
You first need to select the support email provider for the channel you’re trying to connect. After that, simply follow the relevant information on-screen or consult the help files below.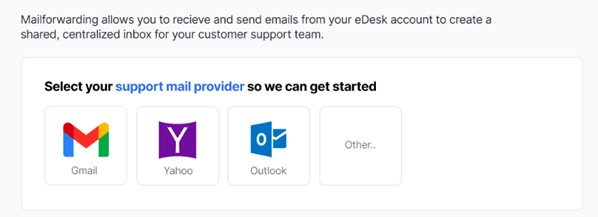
Note: if you’re getting an error message advising you that you cannot use the same email address twice, click here to resolve it.
04 Onboarding eDesk via Shopify
The previous sections of this help file explain how to connect eDesk with Shopify from the eDesk app store. In this section, we'll walk you through how to connect if you're selecting eDesk from the Shopify App store.
1. Login to Shopify and search for eDesk in Shopify's app store.
2. Follow the instructions to connect. If you don't already have an eDesk account, you'll be asked to create an eDesk password, which will automatically create an eDesk account for you and enable you to login to your eDesk.

3. Now follow the instructions in the above section 03 to set up email forwarding in eDesk.
05 Where do I see data from Shopify in eDesk?
Now that you successfully connected your Shopify webstore, we will import data directly into your eDesk account.
You will be able to see all your buyer messages on the Mailbox screen:

You will see the Shopify data related to each ticket on the right-hand side of every single ticket:

And you also will be able to consult all your Shopify orders directly on the Orders screen in eDesk:

Further Readings
If you would like to find out more about connecting Magento with eDesk, click here.
If you would be interested in learning more about connecting BigCommerce with eDesk, click here.

